
Nothing is more elegant than Cherry Pie. No dessert is so dramatic and aromatic. I became inspired to make a Cherry Pie after I saw a Facebook post of a baker making creative cut-out pie crust toppings in a interesting time-lapsed video. I can do that, I mused. I’ll make a Cherry Pie. Mine wasn’t as perfect as the video; but the pie tasted great. And it was quite easy to make, too.
Cherries grow in cooler climates in the United States — the cherry seeds require exposure to cold to germinate. Cherries have a special place in my memories. Our family had a cherry tree in our garden when I was growing up in Virginia. All spring and summer we’d watch the cherries ripen. So did the birds. My folks put a nylon parachute over the tree to discourage the birds. Eventually, the birds won. I don’t remember the cherries as much as the ordeal placing of the parachute over the tree. Washington, D.C. is full of cherry trees. When they blossom in March-April it is a beautiful sight. If you ever have a chance to go visit at this time of year, you won’t be disappointed.
Cherries ripen in the summer, so this is really past the peak time for this fruit — and the price of fresh cherries attested to that fact. Nevertheless, I purchased several pounds of fresh cherries and made my pie. I wanted to try out the cut-out top pie crust technique shown on the mellow and fascinating Facebook video. Looks sooo easy.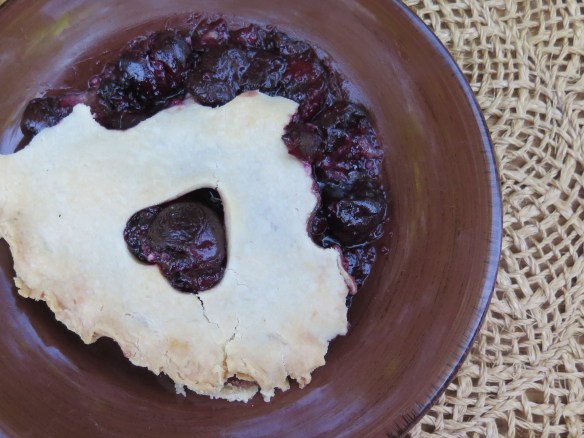
Cherry Pie Recipe
I’m using fresh cherries because there is no comparison with canned cherries or cherry pie filling. The flavor is better and the filling isn’t so sweet. The recipe I’m using is really quite simple, especially if purchased pie dough is used (I didn’t–made if from scratch). My recipe is adapted from the “Joy of Cooking.”
The cherry filling consists of pitted sour cherries, sugar, Minute Tapioca and almond extract. These are mixed and allowed to set for 15 – 30 minutes. Dot on butter after pouring the filling into the pie shell. No cooking on the stove is required.
The most difficult step is pitting the cherries to remove the pits. This requires a little technique and time; but is fairly easy one you catch on. My process is to take a fork, insert it behind the pit, then use my thumb to feel for the pit and roll it up the fork. Find some good music and before you know it the cherries are pitted.
Pie Dough
The easy way to make a pie is to use purchased pie dough that comes in sheets. As the package states “just unroll and bake!”
The more difficult route is to make pie dough from scratch. This requires alot of practice; but pie crusts made this way are flaky and flavorful. I have a recipe using a food processor that works pretty well. I make an extra-large batch to have plenty of dough to overlap the pie shell.
The dough consists of flour, butter, a tiny bit of salt and ice water. The trick to making pie dough is to cut the cold, cold butter in small chunks.
Then pulse the food processor just a couple of times until the butter is the size of small peas. This results in a tender pie dough that is flaky and soft.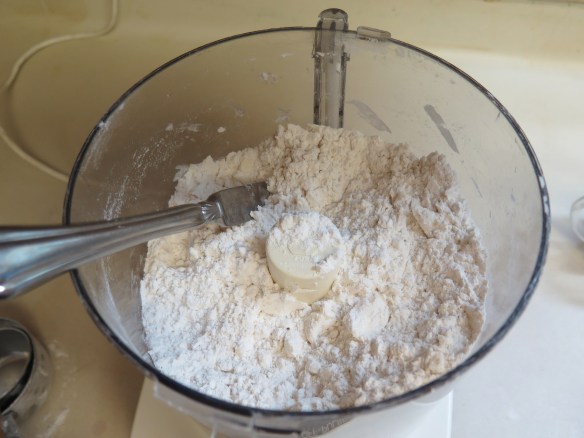
Add ice water — exactly 1/2 cup — and mix until a dough forms.

Divide in half — one for the bottom and the other for the top.
Roll out until the first pie dough piece is a little larger than the pie pan.
Place the pie dough in the pie pan. (I roll the pie dough over the rolling pin and center it on the pie pan, unroll.) Add the filling.

Now make that fancy cut-out pattern on the top pie crust. 
And place the top pie crust on the pie. Cut the edges even with the edge of the pie pan and crimp the edges. 
Bake. First at 400 degrees, and then lower the temperature to 350 degrees. I protect the edge of the pie with aluminum foil so that it does not burn.
Remove the strip of aluminum foil towards the end. Bake the pie until bubbly; remove from oven. serve hot. Delicious, especially with some ice cream.
I also made a 1-crust cherry pie using cornstarch rather than minute tapioca and used heart cut-outs for the top. This one turned out well, too.
Easy and Elegant Cherry Pie
Ingredients for cherry filling
- 4 cups fresh sour cherries
- 1-1/3 cup sugar
- 1/2 cup water
- 3 Tbsp Minute Tapioca or 3 Tbsp cornstarch
- 1/4 tsp almond extract
- 2 Tbsp butter, thin slices
Ingredients for 2-crust pie:
- 2-1/2 cups all-purpose flour
- scant 1/2 tsp salt
- 1 cup cold butter
- 1/2 cup ice water
Method and Steps
- Pre-heat oven to 400 degrees.
- Rinse and sort the cherries. Remove the pits. Take a fork and pierce the cherry behind the pit. Use your thumb to feel for the pit and roll it up the fork and remove. Remove stem, too.
- Place the pitted cherries in a large bowl. Add the sugar, water, Minute Tapioca and almond extract. Mix to combine. Let set 15 to 30 minutes.
- Make the pie crust. Add the flour to bowl of food processor. Add the salt and process to combine.
- Cut the cold butter in chunks and add to flour in food processor bowl. Pulse the food processor two or three times so the butter is size of small peas. Do not over process.
- Add the ice water. Turn processor on and mix until the dough pulls away from the edges of the processor. Remove from processor, gather dough up and divide into two balls; one slightly larger.
- Place larger ball on floured pastry board or kitchen counter. Roll ball out until slightly larger than 9 ” Pyrex pie pan. Use plenty of flour on pastry board and turn pie dough frequently to avoid sticking. Place dough in pie pan.
- Add cherry pie filling to pie pan, scraping in all juices and sugar. Dot with 2 Tbsp butter.
- On floured pastry board, roll second ball out until slightly larger than pie shell. Use cookie cutter to make cut-outs in dough. Transfer to top of pie. There should be plenty of pie dough left over. (Freeze for another pie later.)
- Cut edges even with pie pan and crimp edges.
- Wrap edges with a strip of aluminum foil. Place in 400 degree oven. Bake 10 minutes.
- Turn heat to 350 degrees, bake 30 – 40 minutes longer until pie filling is bubbly and pie is browned on top. Remove aluminum foil strips in last 15 minutes. If needed, tent pie loosely with foil until filling bubbles.
And so I had some fun with fresh cherries and cut-out pie dough today. Both the pie dough and cherry pie freeze well; I’m going to roll the remaining dough out and make another top for later on. Below I have the link to the You-Tube video on pie shell fun.
Here’s the Facebook video from So Yummy Hey, mine doesn’t look too bad!


Yumm!!!!
Thanks!
This looks delicious! I saw the same time-lapse crust video on Facebook : ) You did a great job!
Thanks. Yes it was a fun video; I really liked this one — catchy video and music. The entire video got me in the mood for baking and trying out my somewhat rusty skills making a pie crust.
I made an apple pie after I watched the video; I was craving it so badly. I carved a leaf into the crust : )
I bet it was precious!